Spring has a way of sneaking up on pool owners. One warm weekend arrives, the kids start asking questions, and suddenly, you’re staring at a covered pool wondering where to even begin. Skipping steps or rushing the process almost always leads to the same result: cloudy water, equipment headaches, and a delayed swim season that nobody wants.
This pool opening checklist covers the proper order for opening your pool, key chemical targets, solutions for common issues such as green or cloudy water, and an important pool safety inspection that many guides overlook.
Before You Start – What You Need to Open Your Pool
Gather everything before step one. Stopping mid-process disrupts chemical timing and leaves your pool exposed.
Tools – Telescopic pole, pool brush, leaf skimmer, submersible cover pump, garden hose, pool vacuum, screwdrivers, silicone lubricant, Teflon tape
Inspection mindset – Check expiration dates on test strips; most have a shelf life of 24-36 months. Expired reagents yield inaccurate readings, leading to incorrect chemical dosing.
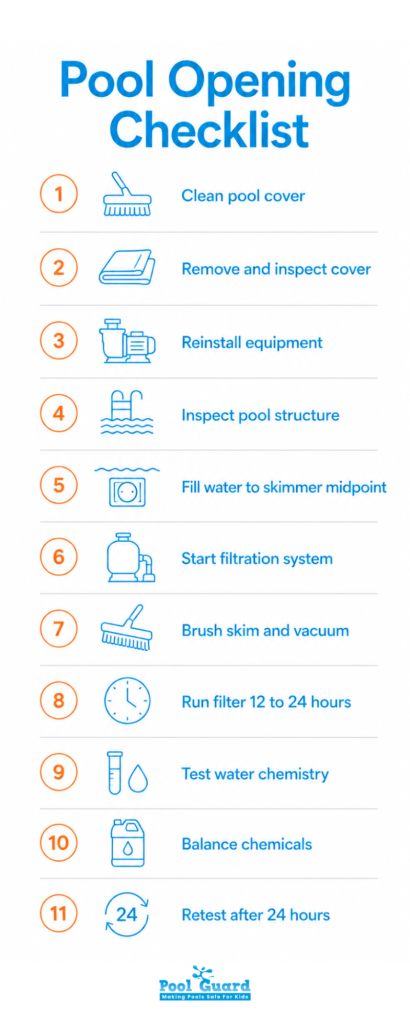
Step-By-Step Pool Opening Checklist
1. Clean the pool area and cover
Remove leaves, branches, and debris from the deck before removing the cover.
Drain standing water from solid covers with a submersible pump.
Use a leaf rake or blower for mesh covers.
2. Remove and inspect the pool cover
Fold the cover accordion-style with a partner to contain debris.
Rinse and dry completely before storage to prevent mold.
Check for tears, cracks, and patch damage immediately.
Apply mildew inhibitor and store in a cool, dry place.
3. Inspect pool structure and equipment
Check walls, floors, tile, and grout for cracks.
Inspect O-rings, gaskets, and seals for wear.
For above-ground pools, inspect the liner for punctures or seam separation.
Verify ground wires and GFCI outlets are functioning properly.
Cold-climate tip –pressure-test circulation lines before filling to detect freeze damage.
4. Reinstall plugs, equipment, and accessories
Remove all winterizing plugs before startup.
Reinstall drain plugs and return fittings with Teflon tape.
Lubricate O-rings with silicone lubricant only.
Reconnect the pump, filter, and heater.
Reinstall ladders, rails, and diving boards.
Confirm drain covers are secure and VGB-compliant.
5. Fill the pool to the proper water level
Fill to the midpoint of the skimmer opening.
Use a pre-filter hose in hard-water areas.
Monitor fittings for leaks during filling.
6. Start the pump and filtration system
Prime the pump by filling the basket with water.
Open the air relief valve until water flows steadily.
Check all fittings and connections for leaks.
Normal startup pressure is typically 10-15 psi.
7. Clean, skim, and vacuum the pool
Skim surface debris.
Brush walls and floors thoroughly.
Vacuum settled dirt and debris.
Empty skimmer and pump baskets.
8. Run the filter system for 12-24 hours
Run the system before adding chemicals.
This removes suspended particles and improves chemical efficiency.
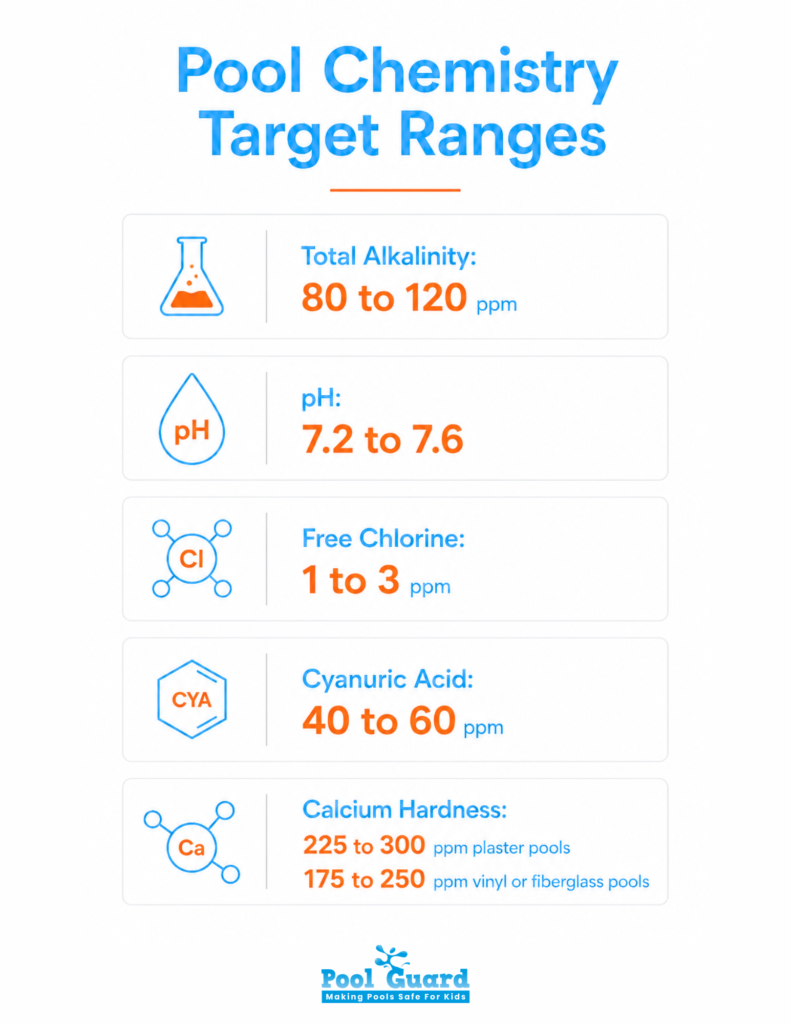
9. Test pool water chemistry
Use fresh test strips or a DPD test kit.
Test all key water parameters.
For the best accuracy, get a professional 10-point water analysis.
Parameter
Target Range
Total Alkalinity
80-120 ppm
pH
7.2-7.6
Calcium Hardness (plaster)
225-300 ppm
Calcium Hardness (vinyl/fiberglass)
175-250 ppm
Cyanuric Acid (stabilizer)
40-60 ppm
Free Chlorine
1-3 ppm
10. Balance chemicals and shock the pool
Adjust alkalinity first to stabilize pH.
Adjust pH second to maintain a 7.2-7.6 range.
Adjust calcium hardness third if levels are low.
Shock the pool last, preferably after dark.
Shock dosage:
1 lb per 10,000 gallons for clear water
1 lb per 8,000 gallons for cloudy water
2-3 lbs per 10,000 gallons for green pools
Add algaecide several hours after shocking, not simultaneously.
11. Retest and adjust
Run the filter for 24 hours after treatment.
Retest and adjust chemicals as needed.
Severely unbalanced pools may take 2-3 days to stabilize.
In-Ground vs. Above-Ground Pool Opening Differences
Factor
Above Ground
Inground
Cover weight
Lighter, one person
Heavier, use a partner
Winter plugs
Skimmer and returns only
Skimmer, returns, main drain, equipment
Surface inspection
Liner – punctures and seam separation
Plaster, tile, and grout for cracks
Plumbing
Flexible hose lines
Rigid PVC; check for freeze cracks
Calcium hardness target
175-250 ppm
225-300 ppm (plaster)
Fill time
2-8 hours
12-48 hours
For in-ground pools, pay close attention to freeze damage in circulation lines. For above-ground pools, inspecting the liner is the most important structural step.
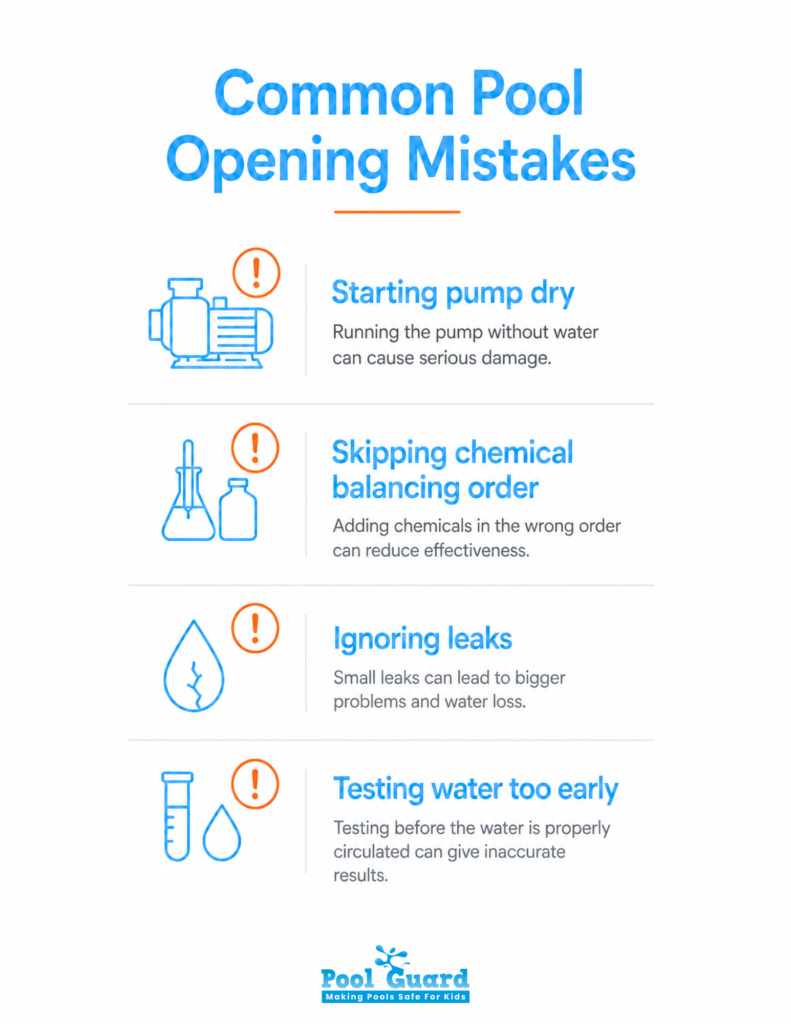
Common Pool Opening Mistakes to Avoid
Starting the pump dry – Running the pump without water in the basket can quickly damage the impeller.
Skipping chemical balancing order – Shocking before adjusting alkalinity and pH wastes chemicals and often causes cloudy water.
Ignoring small leaks – Minor drips can worsen under pressure and turn into costly repairs.
Not running the filter long enough before testing – Water that hasn’t fully circulated through the filter gives inaccurate readings and can lead to overdosing chemicals.
Pool Opening Troubleshooting Guide
Low filter pressure
Low filter pressure is usually caused by clogged filter media or a closed valve restricting water flow. Backwash or clean the filter and confirm all system valves are fully open before restarting the system.
Air bubbles from return jets
Air bubbles coming from return jets often indicate a suction-side leak near the skimmer or pump connections. Inspect skimmer fittings, pump lids, and suction lines for loose connections or cracks.
Cloudy water after shocking
Cloudy water for 2-3 days after shocking is normal as contaminants are being filtered out. Run the filter continuously and use a clarifier if needed, but avoid unnecessary extra shock.
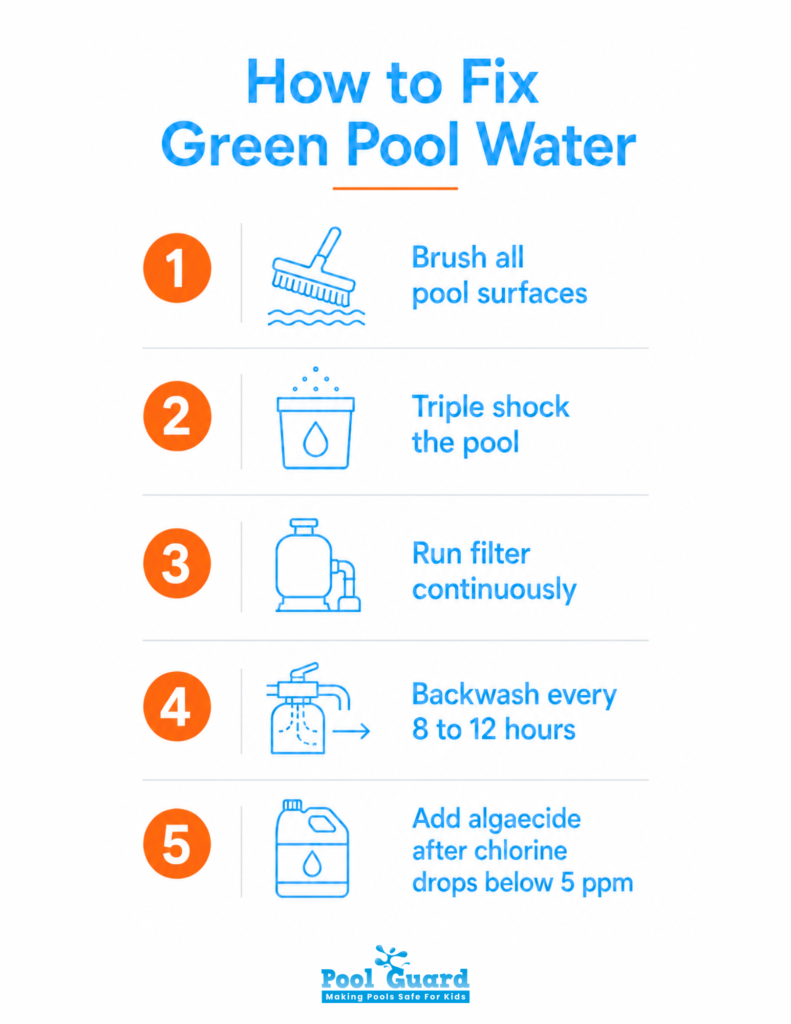
Green water
Green water usually indicates active algae growth. Brush all pool surfaces thoroughly before triple-shocking the pool. Run the filter continuously and backwash every 8-12 hours until the water clears. Add algaecide only after chlorine levels drop below 5 ppm.
Persistent fitting leaks
Leaks around fittings are often caused by loose connections or worn thread seals. Tighten fittings and reseal threaded areas with Teflon tape. If leaking continues, inspect pipes and equipment housings for hairline cracks.
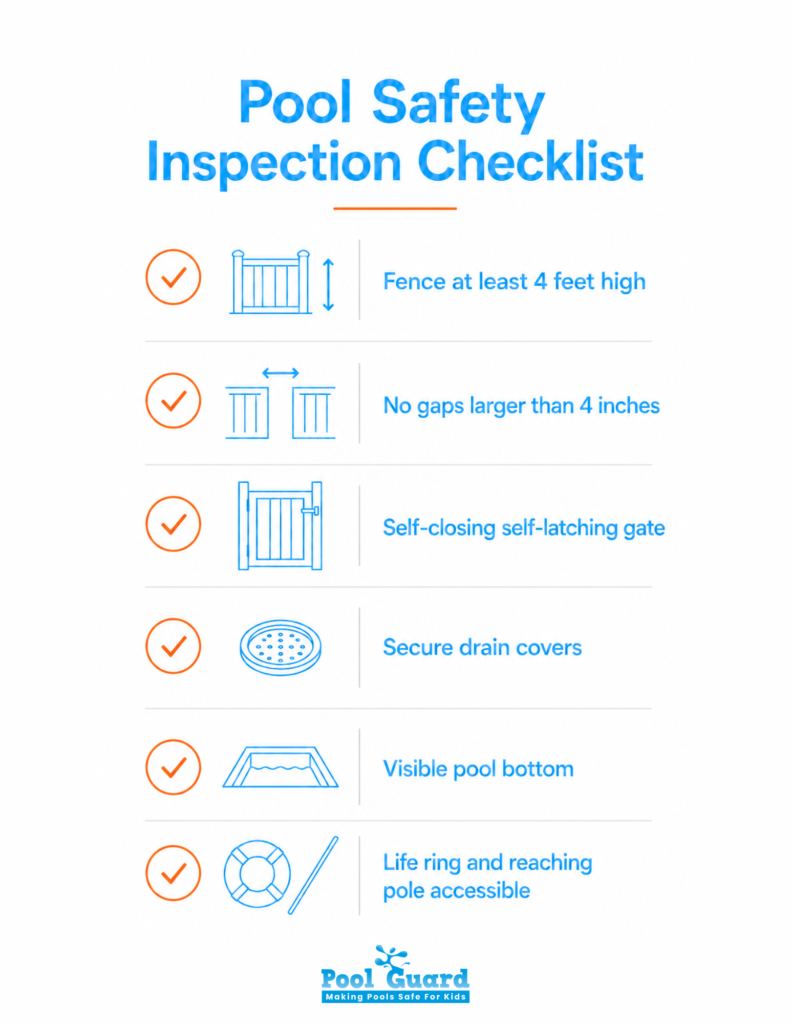
Pool Safety Checklist
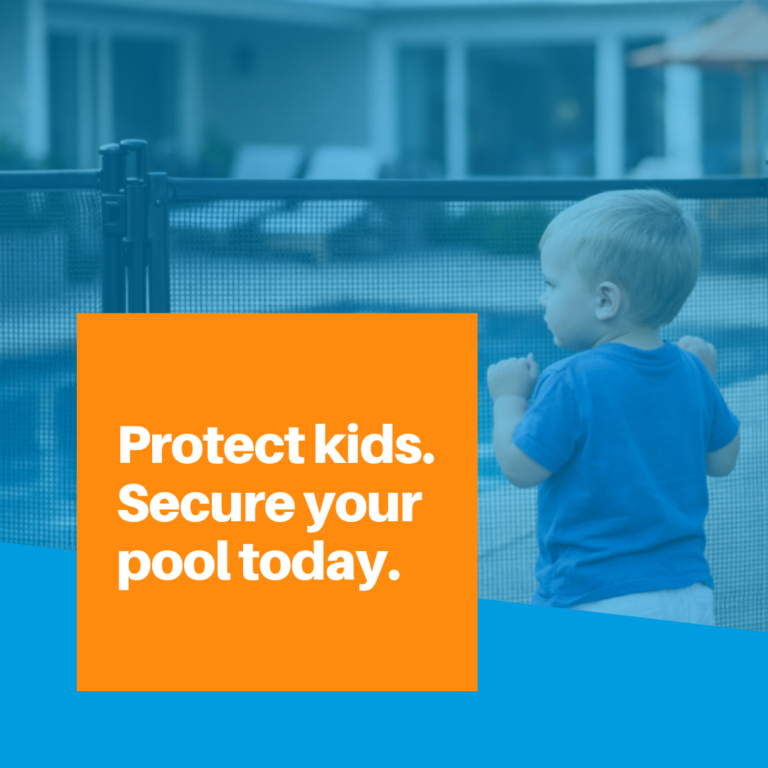
Pool safety isn’t an afterthought; it’s the most important step before your first swim.
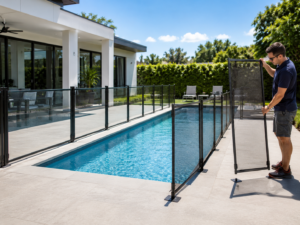
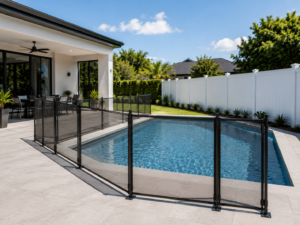
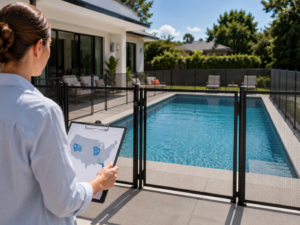
Inspect safety barriers
Inspect your pool fence for stability, gaps, and damage. According to the U.S. Consumer Product Safety Commission, pool barriers should be at least 4 feet high, with no footholds and no gaps larger than 4 inches. Walk the full perimeter, as winter ground shifts or storm damage can weaken the fence without obvious signs.
Check access points
Test every gate latch and lock. Self-closing, self-latching gates should close and latch automatically every time. Replace or adjust faulty hardware, and check hinges for rust or misalignment.
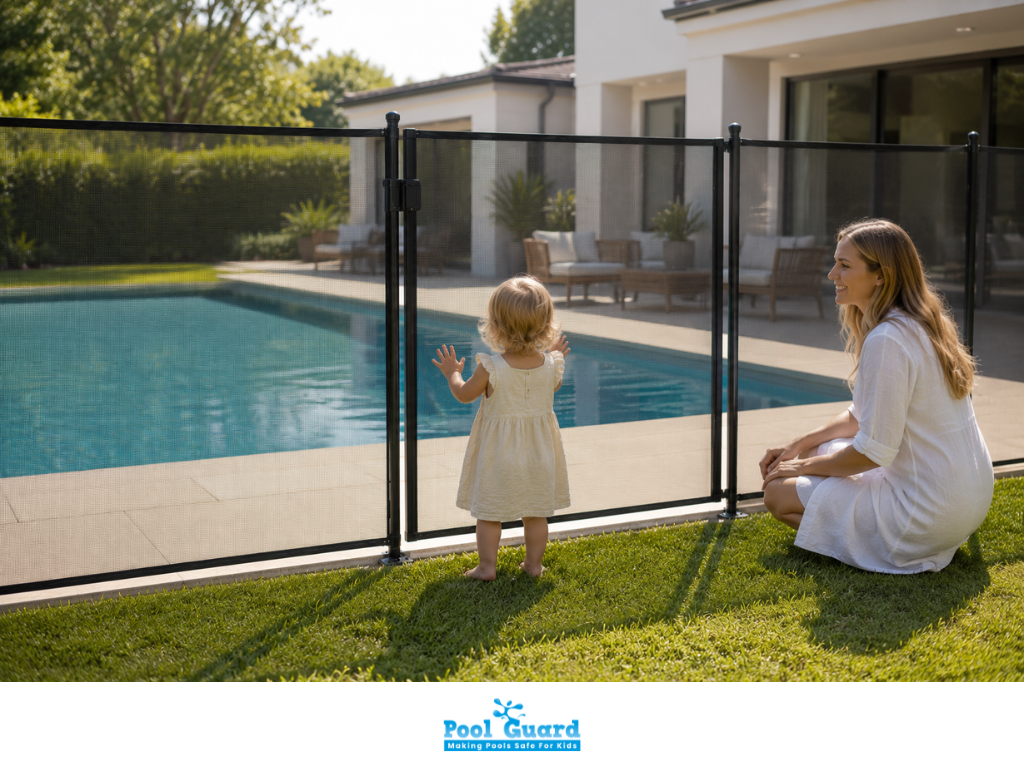
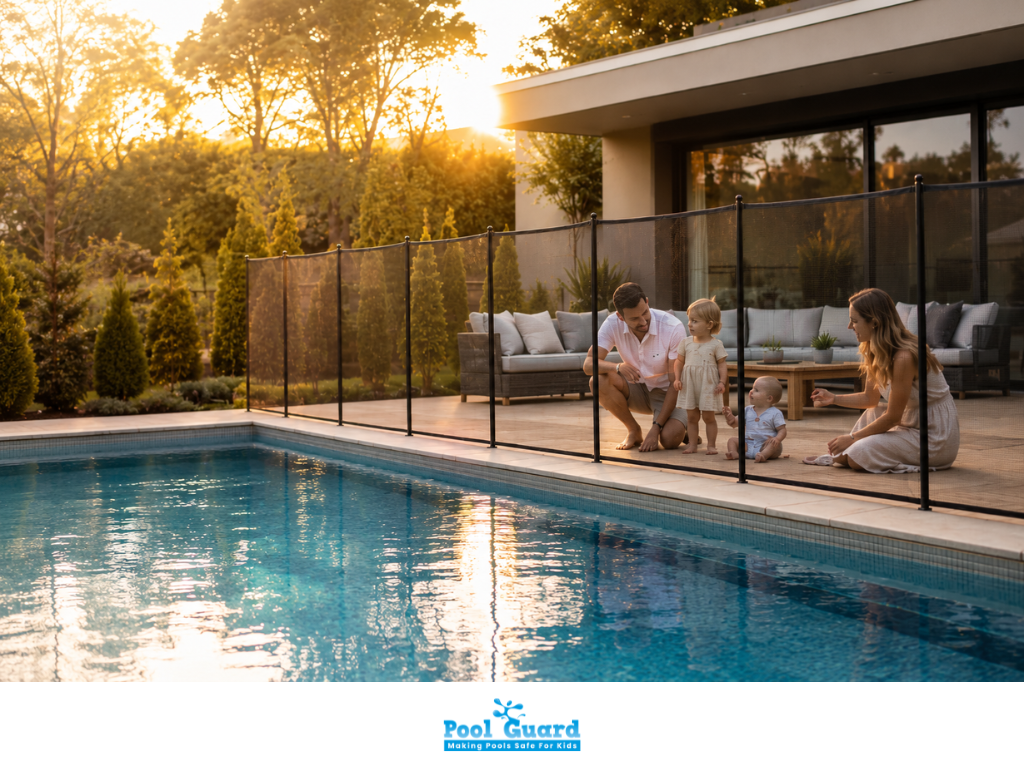
Why pool barriers and secure access matter
Drowning is the leading cause of unintentional injury death among U.S. children ages 1-4, with many incidents linked to inadequate pool barriers and lapses in supervision. Even a clean, chemically balanced pool remains hazardous without proper safety measures. Pool Guard USA specializes in code-compliant pool safety barriers and enclosures that help create a safer environment for families.
Final Checklist Before First Swim
Before anyone gets in the water, confirm:
Water is clear, and the pool bottom is fully visible
Free chlorine is 1-3 ppm; pH is 7.2-7.6; alkalinity is 80-120 ppm
The pump and filter are running normally with stable pressure
All ladders, handrails, and drain covers are secure
The pool fence, gate, and latch are functioning correctly
Safety equipment (life ring, reaching pole) is accessible poolside
When all six are checked, your pool opening checklist is complete, and your pool is ready for the season. Enjoy the summer safely.
Find your local dealer by entering your zip code above.