A pool gate that fails to self-close leaves an open, dangerous path between a child and the water. Because drowning is the leading cause of accidental death for children ages one to four, safety codes strictly require pool gates to latch automatically from any position.
Learning how to adjust pool gate hinges keeps your barrier secure, reliable, and fully compliant. This guide walks through exactly how to restore proper tension, fix common failure points, and recognize when it is time to call a professional.
How to Adjust Pool Gate Hinges
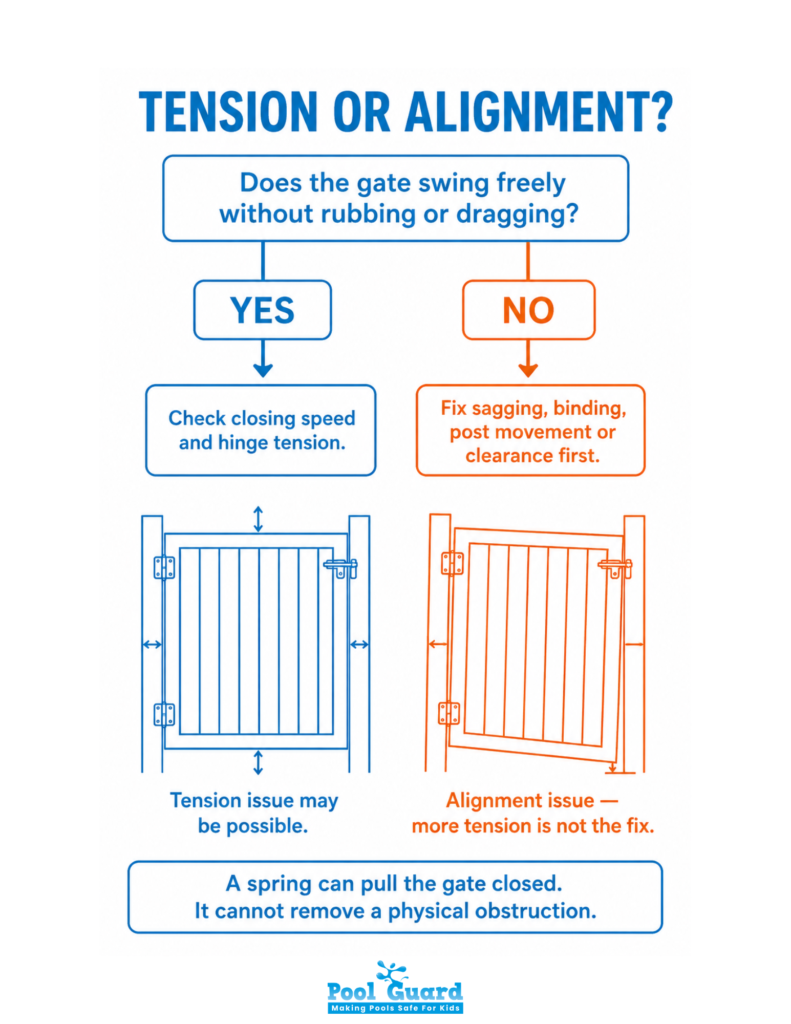
Check the gate before adjusting anything; not every problem is a tension problem.
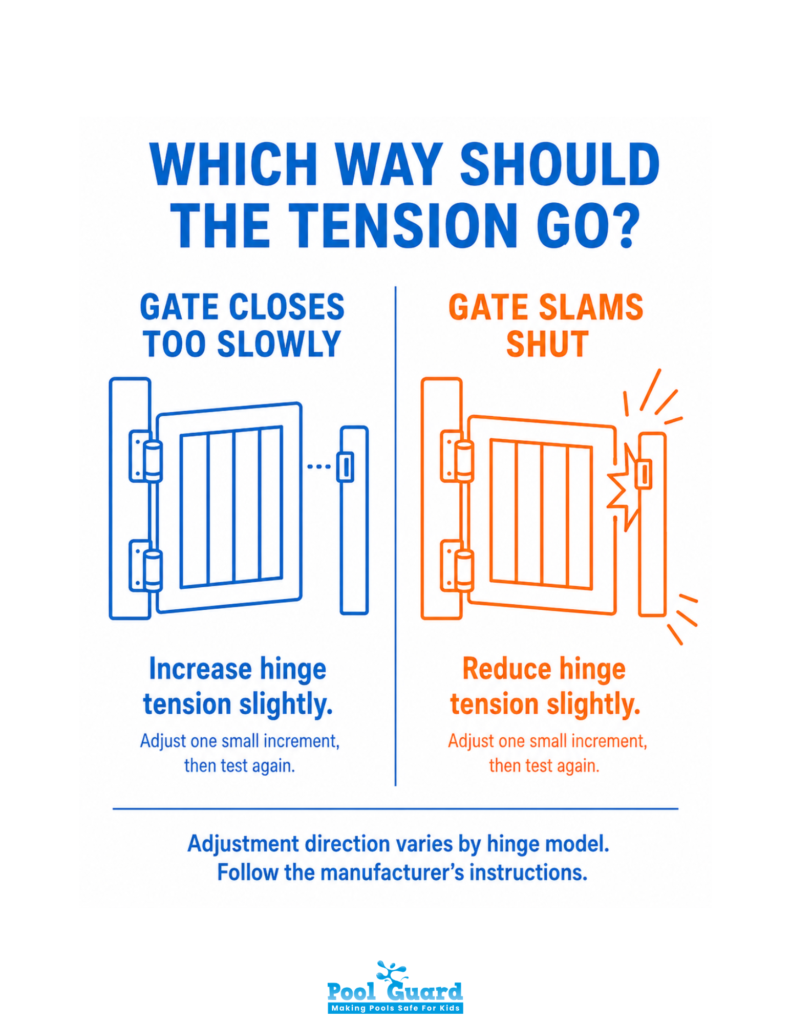
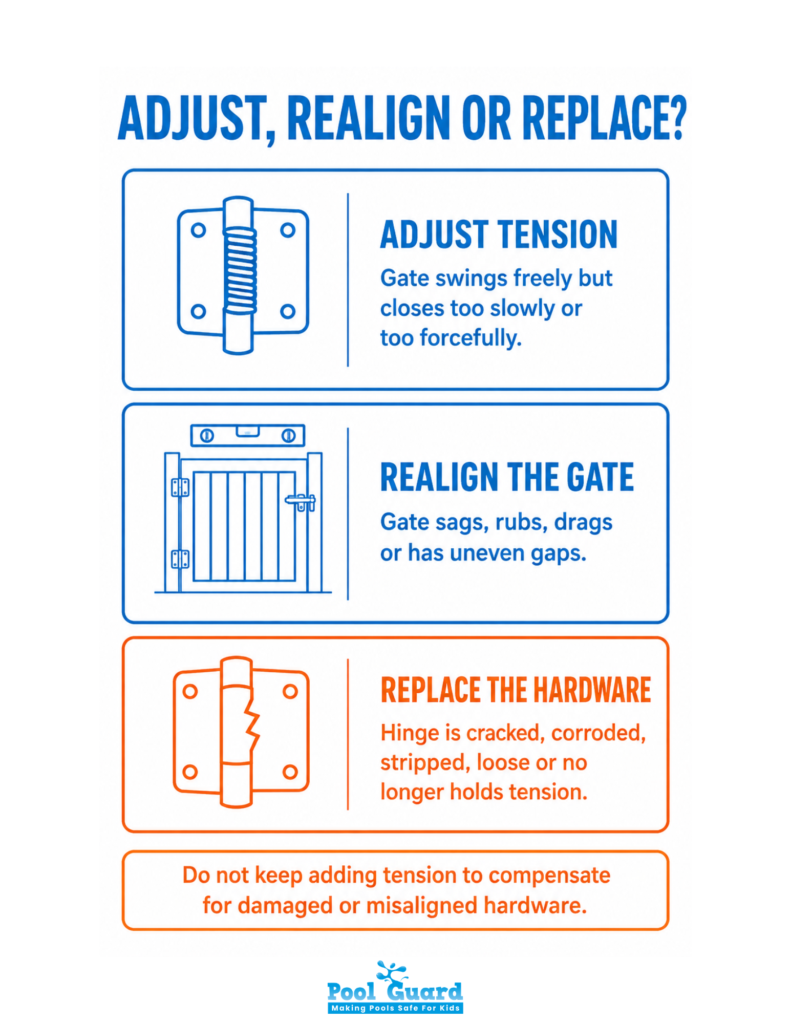
Increase hinge tension if the gate closes too slowly or stalls before latching.
Reduce hinge tension if the gate slams shut.
Fix sagging or dragging before blaming the latch; a dragging gate will never latch reliably, no matter how much tension you add.
If the gate still fails after adjustment, call a professional rather than forcing the hardware.
Signs Your Pool Gate Hinges Need Adjustment
Most hinge problems show up as one or more of the following:
The gate does not self-close at all.
The gate stops just short of the latch instead of clicking shut.
The gate slams shut with force.
The gate drags on the ground as it swings.
The gate visibly sags at the latch side.
The gate rubs against the post when opening or closing.
The latch no longer lines up with the striker.
The hinge tension does not hold – the gate feels loose or spins freely.
If you’re only seeing one of these, that’s your clue to the fix. If you’re seeing several at once, especially dragging and poor latching, the hinges themselves may be worn or the gate may have shifted out of alignment, which tension adjustment alone won’t solve.
Tools You May Need
Screwdriver
Allen key (hex key) set
Hinge tension tool or tension rod, sized to your specific hinge model
Level
Measuring tape
Safety glasses – essential, since spring-loaded hinges are under load and can eject a tool if your grip slips
Replacement screws or hinges, in case worn or corroded hardware needs to be swapped rather than adjusted
Step 1. Inspect the Gate First
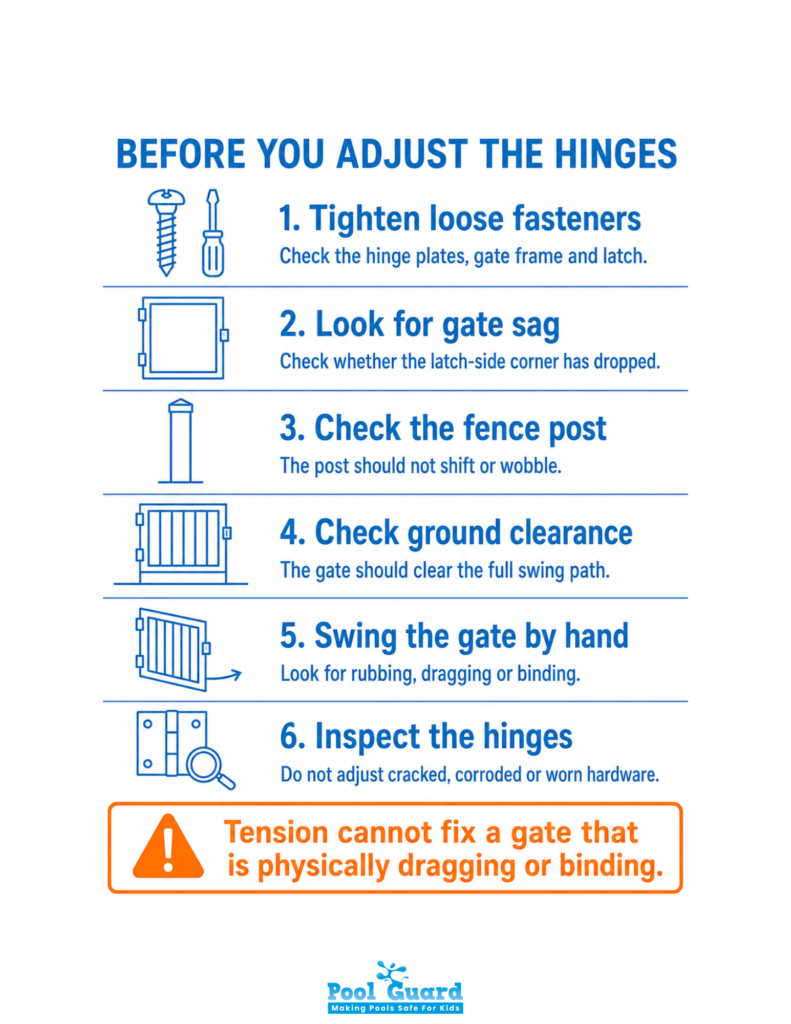
Before turning on any tension mechanism, rule out mechanical issues that adjustment can’t fix:
Check for loose screws at the hinge plates and latch.
Check for gate sag – stand back and look at whether the latch-side corner has dropped.
Check for post movement – grab the post and see if it shifts or wobbles in the ground or footing.
Check ground clearance along the full swing path.
Check whether the gate swings freely by hand, without resistance from binding or rubbing.
Check whether hinges are cracked, rusted, or visibly worn.
Key point: If the gate is dragging or binding, tension adjustment may not fix it. Springs can only pull a gate closed. They can’t overcome a gate that’s physically catching on the ground or a post.
Step 2. Adjust Self-Closing Pool Gate Hinge Tension
Once you’ve ruled out mechanical issues, move to the hinge itself:
Locate the hinge tension mechanism; usually a collar with adjustment holes, or a numbered dial, on the top or bottom of the hinge barrel.
Use the correct tool for your hinge model. Generic tension rods work on pin-and-collar hinges; numbered dial hinges typically need a 5mm hex wrench.
Increase tension for a slow or lazy gate that won’t fully close.
Decrease tension to prevent a gate from slamming shut.
Adjust in small increments, one hole or one dial number at a time, and retest before adjusting further.
Follow the manufacturer’s instructions for your specific hinge, as mechanisms vary between brands.
Note: Some hinges turn clockwise to tighten, but not all models work the same way. Check resistance as you turn rather than assuming direction.
Step 3. Adjust Both Hinges Evenly
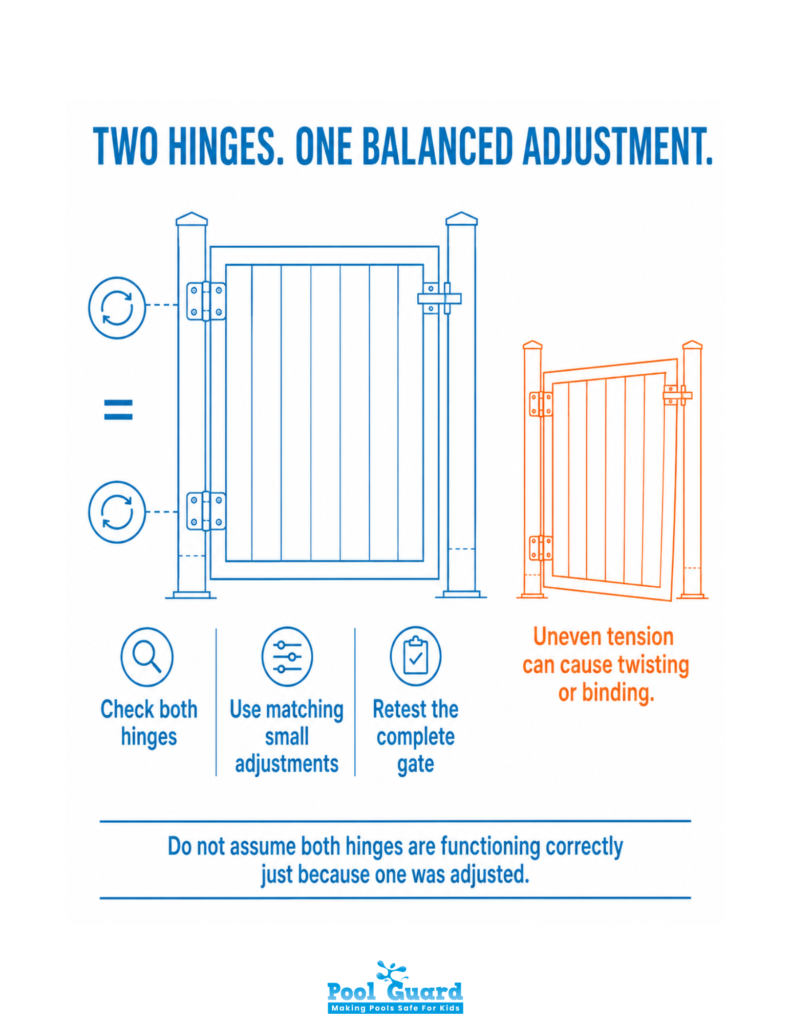
A gate with two hinges needs matched adjustment, not just a fixed top or bottom hinge:
Top and bottom hinges should usually be adjusted the same amount.
Uneven tension can twist the gate as it closes.
Uneven tension may cause binding or poor latch alignment, even if each hinge feels fine on its own.
Test after every adjustment, on both hinges together, not just the one you last touched.
Step 4. Fix Sagging or Uneven Gaps
If the gate sags or the gap to the post is uneven, tension isn’t the issue; the mounting is:
Tighten hinge fasteners at both the gate and post plates.
Check hinge position for any slippage from the original mounting point.
Confirm gate-to-post spacing is even along the full height of the gate.
Use a level to check that the gate is hanging square, not angled.
Check whether posts have shifted in their footing, which throws off alignment no matter how the hinges are adjusted.
Replace worn hinges if the sag keeps returning after tightening – a stretched or fatigued hinge won’t hold its position permanently.
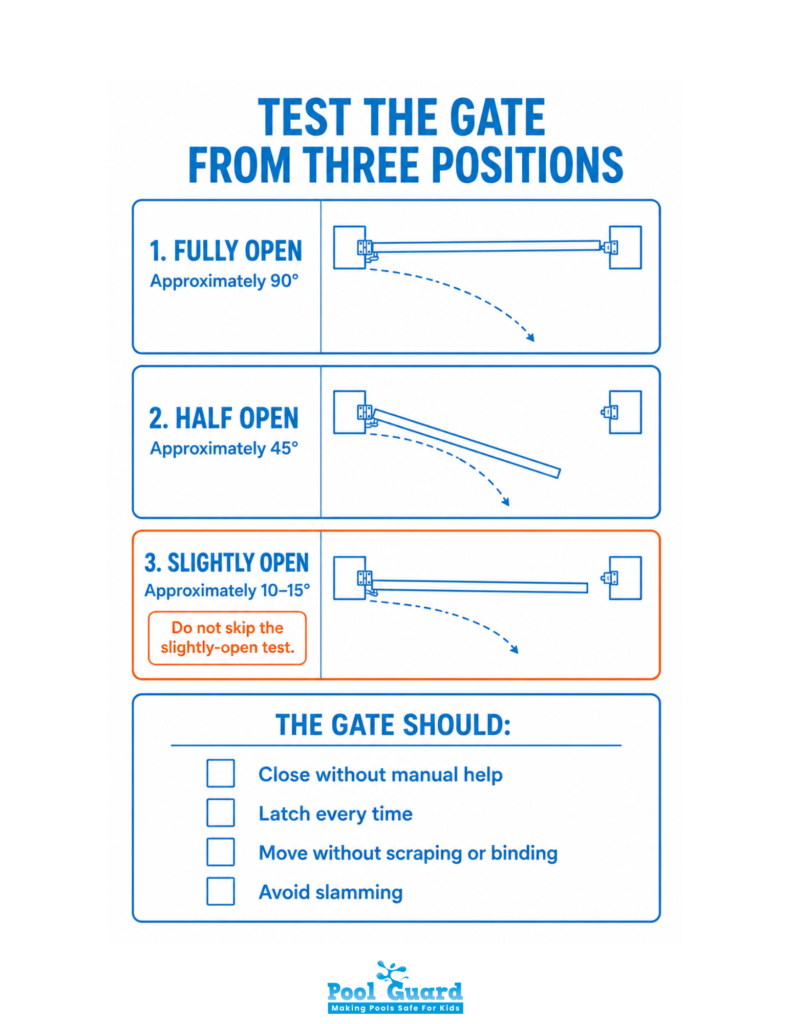
Step 5. Test the Gate From Multiple Positions
Adjustment isn’t finished until the gate passes from every angle, not just one:
Test from
Fully open (around 90 degrees)
Half open
Slightly open (10-15 degrees)
The gate should
Swing smoothly through its full range
Close without any manual help
Latch every time, from every test position
Avoid slamming
Avoid scraping or binding on the ground or post
The slightly-open test is the one most people skip, but it’s usually the one inspectors actually check. A gate that only self-closes from wide open will fail a compliance check even if it looks fine day to day.
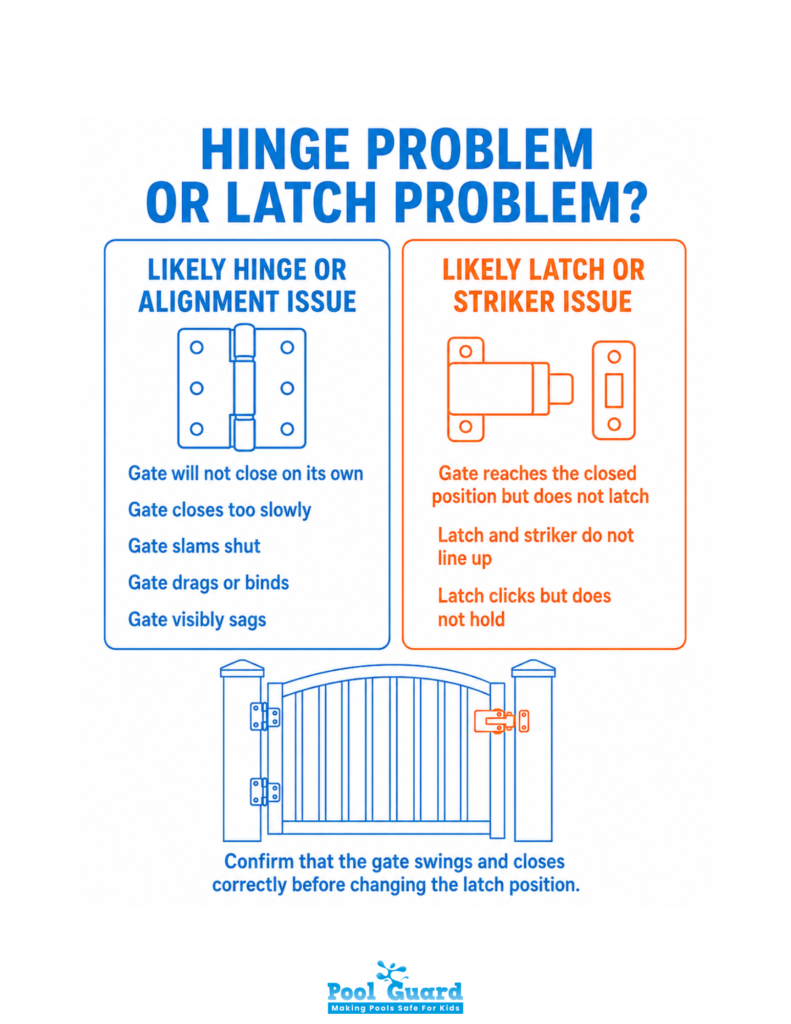
When It’s a Latch Problem, Not a Hinge Problem
If the gate swings shut correctly but fails to stay locked, the issue lies downstream of the hinges. For instance, a MagnaLatch often requires its own separate adjustment even when the hinges are perfectly balanced.
When the gate clicks but doesn’t hold, check the alignment between the latch and the striker plate. A latch that engages but releases under light pressure points directly to a striker positioning issue rather than a lack of hinge tension.
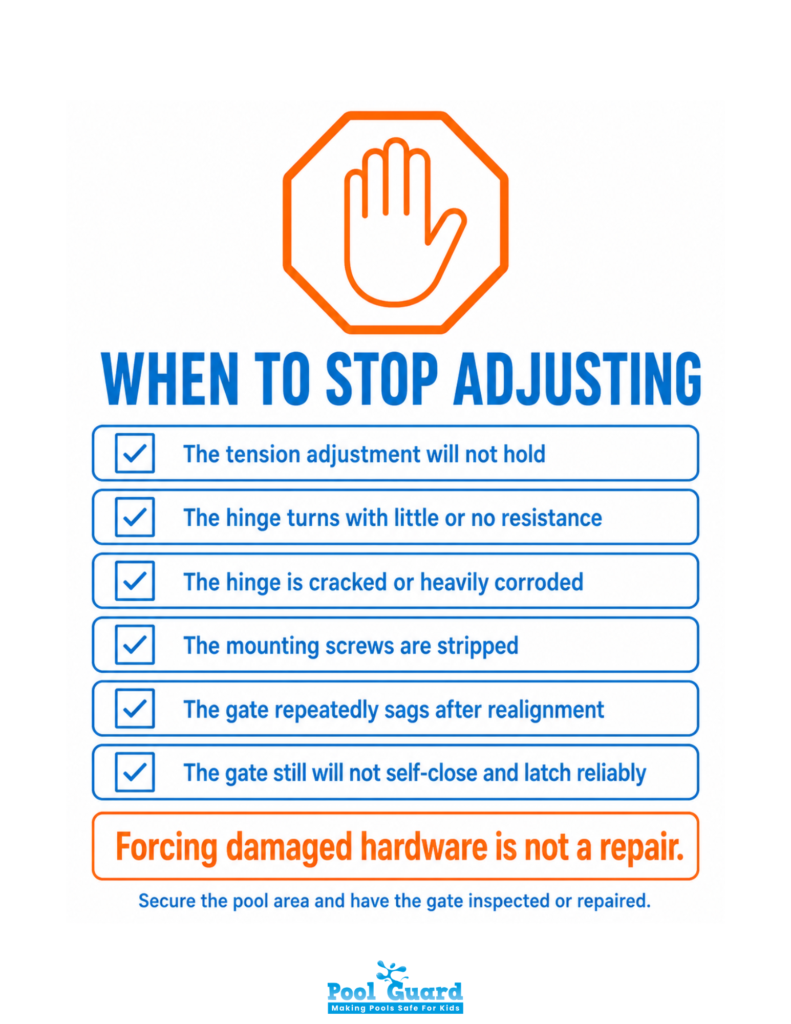
When to Replace Pool Gate Hinges
Adjustment has limits. Replace the hinge or call a professional if:
Hinge tension will not hold, even after adjustment
The internal spring feels broken – the collar spins with no resistance
The hinge is cracked or corroded
Screws are stripped and won’t tighten
The gate keeps sagging no matter how often it’s corrected
The gate will not self-close after a proper adjustment attempt
The gate no longer meets self-closing, self-latching safety requirements
Final Takeaway
Hinges control a pool gate’s swing, tension, and closing force, making them the absolute priority for gate stability. Learning how to adjust pool gate hinges is essential because most gate alignment issues stem directly from incorrect hinge tension or sagging positions.
A fully compliant gate must self-close and self-latch from multiple open positions, not just when opened wide. If your adjustments fail to hold after a fair attempt, you likely have worn hardware that requires a replacement part or a professional repair rather than a tighter setting.
Find your local dealer by entering your zip code above.