Adding too little chlorine can leave your pool water inadequately sanitized, while adding too much may delay swimming. Finding the correct dose depends on several factors, including pool volume, current free chlorine levels, and product strength. A pool chlorine calculator makes this easier by estimating how much chlorine you need to reach your target level.
This guide explains how to use the calculator, determine chlorine targets based on stabilizer levels, and adjust dosing for different chlorine products. It also covers important safety precautions to follow when treating your pool water.
For accurate results, enter your pool volume, current and target free chlorine levels, and chlorine product strength. The calculator estimates how much product to add. Double-check your inputs to avoid incorrect dosing.
[TOOL]
Your pool volume may be listed in the builder’s paperwork or installation records. If unavailable, use the following formula to estimate the volume of a rectangular pool:
Pools with irregular shapes or complex depth changes may require a different calculation.
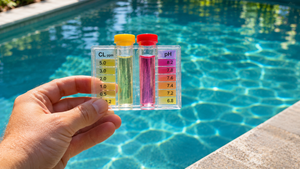
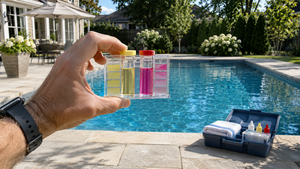
Next, find your current free chlorine level using a DPD test kit or suitable test strips. Choose your target level based on CDC chlorine recommendations and whether your pool uses stabilizer. Both values are measured in parts per million (ppm), approximately equal to milligrams per liter in pool water. For example, increasing chlorine from 1 ppm to 3 ppm requires a 2 ppm rise.
You also need the liquid chlorine concentration, usually listed on the product label as a percentage of sodium hypochlorite. This matters because different strengths require different doses.
Finally, check your inputs to avoid dosing errors. Overestimating pool volume can lead to excessive chlorine, while entering total chlorine instead of free chlorine gives an incorrect starting point. Total chlorine includes both free and combined chlorine.
Cyanuric acid (CYA), also called stabilizer or conditioner, protects chlorine from sunlight so it lasts longer in outdoor pools. Products such as dichlor and trichlor add CYA with each dose. However, higher stabilizer levels slow chlorine’s ability to kill germs, so more free chlorine is needed to maintain effective sanitation.
The CDC recommends at least 1 ppm free chlorine without CYA and 2 ppm when CYA is present. These are baseline recommendations, not the maintenance targets below. The table provides approximate free chlorine targets for manually chlorinated pools using the Trouble Free Pool FC/CYA approach.
| Cyanuric acid level (ppm) | Minimum free chlorine (ppm) | Target free chlorine (ppm) | SLAM level (ppm) |
| 20 | 2 | 3-5 | 8 |
| 30 | 2 | 4-6 | 12 |
| 40 | 3 | 5-7 | 16 |
| 50 | 4 | 6-8 | 20 |
| 60 | 5 | 7-9 | 24 |
| 70 | 5-6 | 8-10 | 28 |
| 80 | 6 | 9-11 | 32 |
| 90 | 7 | 10-12 | 36 |
Test your CYA level before setting a chlorine target. Use maintenance ranges for routine dosing and SLAM levels for algae treatment. High CYA may require partial water replacement. Always follow local requirements and product instructions.
Shocking a pool raises free chlorine above normal levels to address water problems. Breakpoint chlorination helps remove chloramines that cause strong chlorine odors, while algae treatment requires maintaining elevated chlorine until the problem clears.
Before shocking, identify the problem and test your free chlorine level. Set the treatment target using product instructions or the CYA-based method above, then enter it into the calculator to estimate the required dose. Some treatments need repeated testing and additional chlorine rather than a single application.
| Situation | Target Free Chlorine | Wait Before Swimming |
| Heavy Pool Use | 5-10 ppm, if specified on the product label | Until testing confirms the label’s re-entry conditions |
| Combined Chlorine Buildup | Follow the appropriate breakpoint chlorination target | Until treatment is complete and chlorine returns to the permitted range |
| Algae Treatment | Follow the appropriate CYA-based treatment target and product instructions | Until treatment is complete, the water is clear, and reopening conditions are met |
Don’t reopen the pool based on time alone. Retest the water and confirm that chlorine has returned to the permitted range before swimming. Readings above 10 ppm can give falsely low results with some DPD test kits, so check the test manufacturer’s instructions. Make sure all product-specific re-entry conditions are met.
Once you have your pool measurements, follow these steps to use the pool chlorine calculator, add chlorine, and check the results:
Safe handling matters just as much as accurate dosing. The CDC recommends reading the product label before each use and wearing appropriate protective equipment, such as gloves and goggles. Never mix pool chemicals or combine chlorine with acid. Only pre-dissolve chemicals if the label instructs you to, adding the chemical to water rather than water to the chemical.
If the chlorine reading remains below the target, contaminants may be increasing chlorine demand. Check whether your test kit and reagents have expired or were stored improperly. Address any identified issues and retest before adjusting the dose.
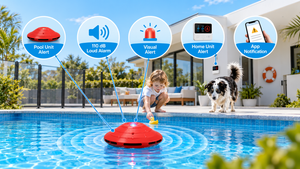
After using our pool chlorine calculator and adding the dose, keep the pool secured while swimming remains restricted. A physical barrier helps prevent unsupervised access during treatment and whenever the pool is unattended. The CPSC recommends fences at least 48 inches high, with self-closing, self-latching pedestrian gates.
When choosing a barrier, consider your pool layout and local safety requirements. At Pool Guard USA, we offer pool fences and residential safety covers to help homeowners secure their pools. Check your local pool safety regulations before choosing a barrier to ensure it meets the requirements for your property.
Alongside securing the pool, put treatment chemicals safely away after each use. Keep products in their original labeled containers in a locked, dry, well-ventilated space away from direct sunlight. Separate incompatible chemicals, as outlined in CDC storage guidance, to prevent accidental mixing. Follow manufacturer instructions and applicable building and fire codes when arranging this storage area.
Together, secure pool barriers and proper chemical storage help reduce safety risks during treatment and routine pool maintenance.
Find your local dealer by entering your zip code above.
Please fill out the form below with your information. Your local dealer will be notified about your inquiry.