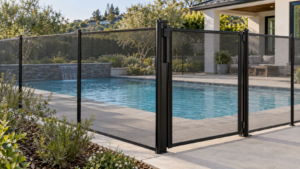
A pool gate latch helps prevent children from entering a pool area unsupervised, but its placement matters as much as its function. Even a latch positioned high on the gate may be accessible if the release can be reached from outside. For this reason, proper installation involves more than height alone, including release accessibility and the gate’s ability to close and latch automatically.
Pool gate latch height requirements vary by location and depend on the gate design and applicable building codes. Knowing which rules apply helps prevent installation mistakes and potential inspection failures. This guide covers common height requirements, how to measure the release correctly, and what to check before installing or adjusting a latch.
Pool gate latch height requirements depend on the locally adopted building code, the type of pool, and whether the release is accessible from outside the barrier or only from the pool side.
The commonly cited height is 54 inches, referenced in the International Swimming Pool and Spa Code and the U.S. Consumer Product Safety Commission’s safety guidelines.
Local code editions, amendments, and pool fence laws by state can establish different rules. For example, California Health and Safety Code §115923 requires qualifying pool enclosure gates to open away from the pool, close and latch automatically, and have a self-latching device at least 60 inches above the ground. The law has exemptions, including public pools and certain residential properties.
Before installing a latch, confirm the applicable requirements with your local building department. Model codes and CPSC guidance also distinguish between releases accessible from outside the barrier and those located on the pool side, with different placement conditions for each.
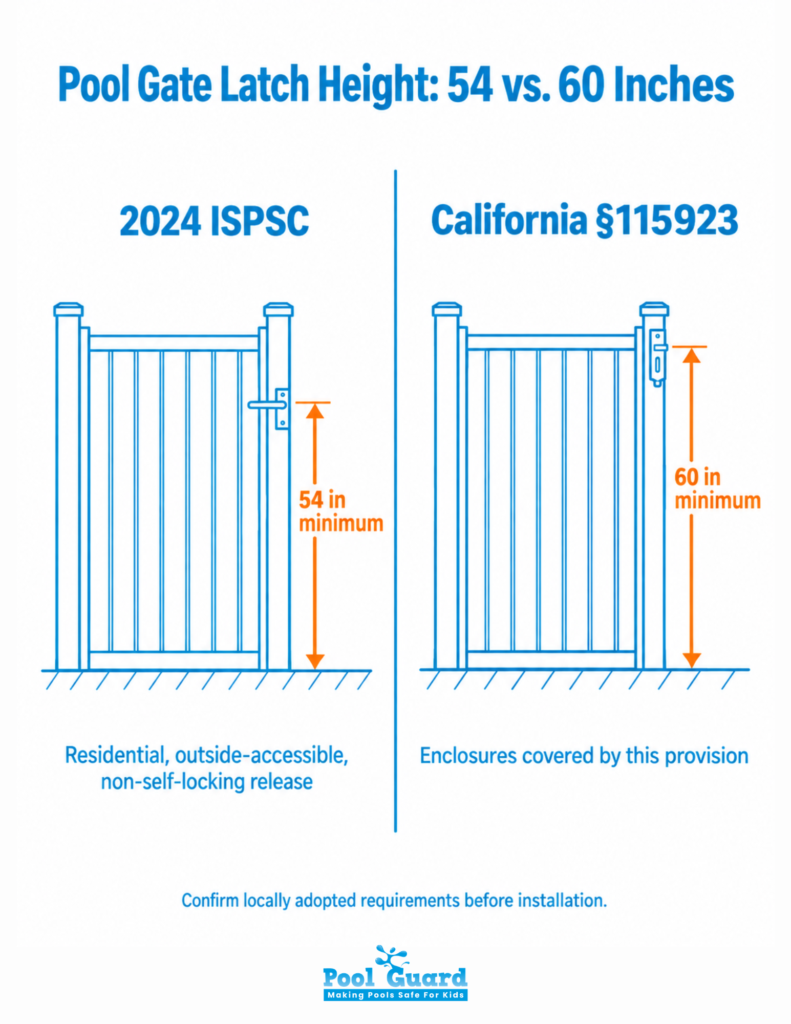
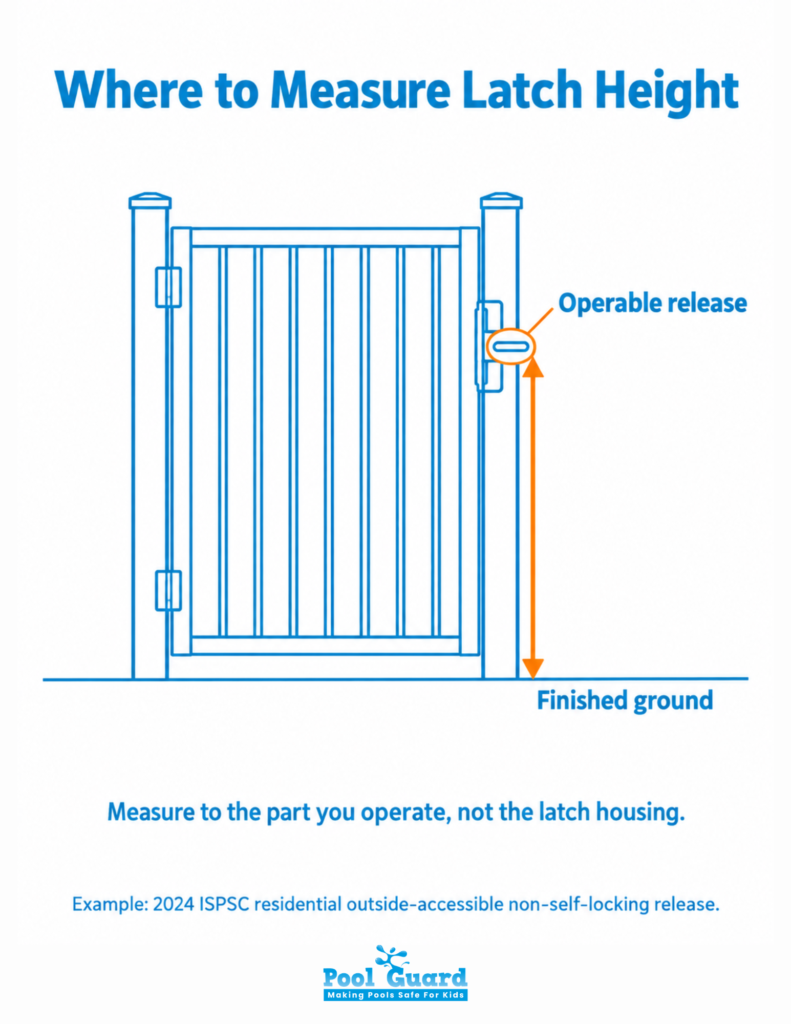
Under the 2024 ISPSC, a non-self-locking latch release accessible from outside a residential pool barrier must be at least 54 inches above the finished ground or floor. This helps keep the release beyond young children’s reach.
Self-locking hardware may follow different placement requirements, so confirm that your latch type meets the applicable code before installation.
For private residential pools, the 2024 ISPSC requires a latch release accessible only from the pool side to be at least three inches below the top of the gate. Openings within 18 inches of the release must not exceed ½ inch in any dimension to prevent children from reaching through the barrier.
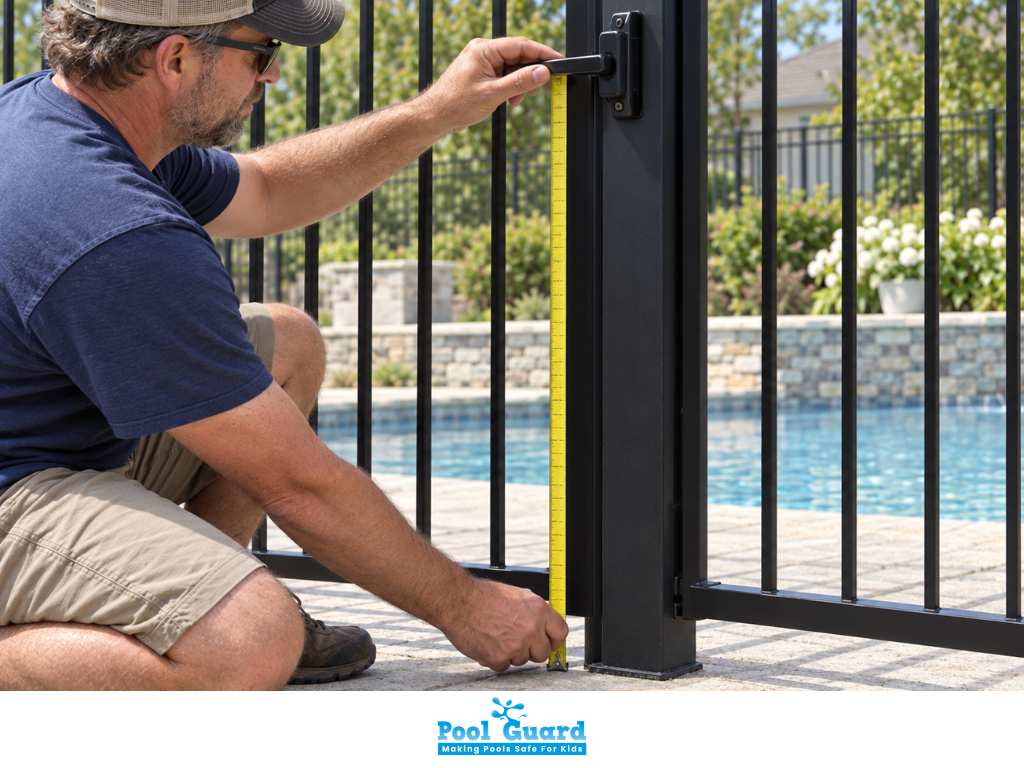
Measuring your pool gate latch correctly starts with identifying the part used to open it. This is the operable release, which may be a lever, button, or pull ring. Measure to this part rather than the latch housing, mounting screws, or catch on the gatepost.
Once you’ve identified the release, use a measuring tape to check its vertical distance from the required starting point. For example, a release positioned 56 inches above the finished ground meets a 54-inch minimum but falls short of a 60-inch requirement. However, the starting point also matters because different standards use different references:
If there’s a gap beneath the gate, these measurements will differ. Follow your local code’s requirements and allow some margin above the minimum height.
Changes to paving, landscaping, or deck surfaces can also affect the measurement. For this reason, recheck the latch whenever the ground level around the gate changes.
After checking the height, make sure the release cannot be easily accessed from outside the pool area. This is especially important for latches positioned on the pool side of the gate.
Inspect the following:
If the release remains accessible, consider a compatible latch guard, smaller openings, or different hardware. Simply adjusting its height may not be enough to address the problem.
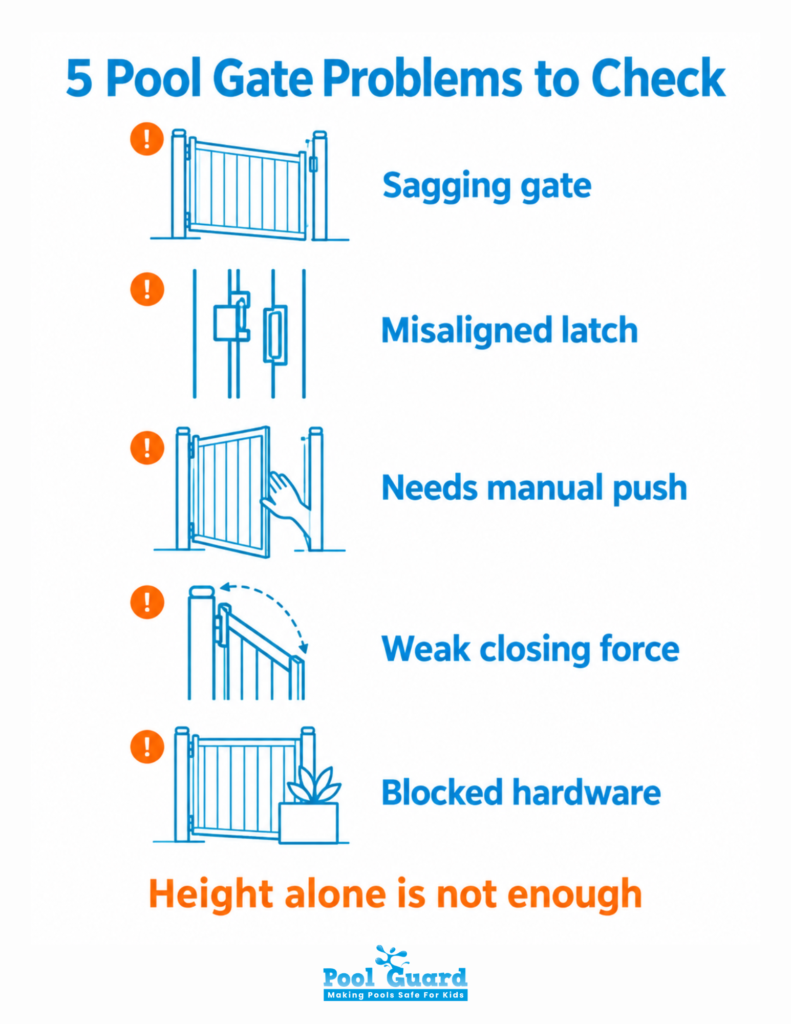
Even when a pool gate latch meets height requirements, the gate may still fail to close or latch properly. Worn hardware, poor alignment, and closing problems can compromise the barrier’s effectiveness. Here are the most common issues to check.
Over time, hinges can loosen, and gateposts can shift, causing the latch to move out of alignment with the catch. As a result, the gate may close without securing properly. If alignment is the issue, understanding how to adjust pool gate hinges can help you identify the necessary corrections before moving the latch.
Even a small alignment problem can prevent the latch from engaging. The latch may hit the striker and bounce back, making the gate appear closed when it isn’t secured. Check that both components line up and engage fully without forcing the gate shut.
A self-closing pool gate should close and latch without assistance. If you need to push or pull it into place, the closing mechanism may need adjustment. Check for hinge problems, obstructions, or friction that prevents the gate from moving freely.
Self-closing hinges can lose tension or become worn over time. When this happens, the gate may slow down or stop before reaching the latch. Adjust or replace the hardware as needed, following the manufacturer’s instructions.
Zip ties, hooks, and other temporary restraints can interfere with the gate’s safety features. Propping the gate open also defeats its protective function, regardless of latch height. Keep the closing path clear and never disable the self-closing or self-latching mechanism.
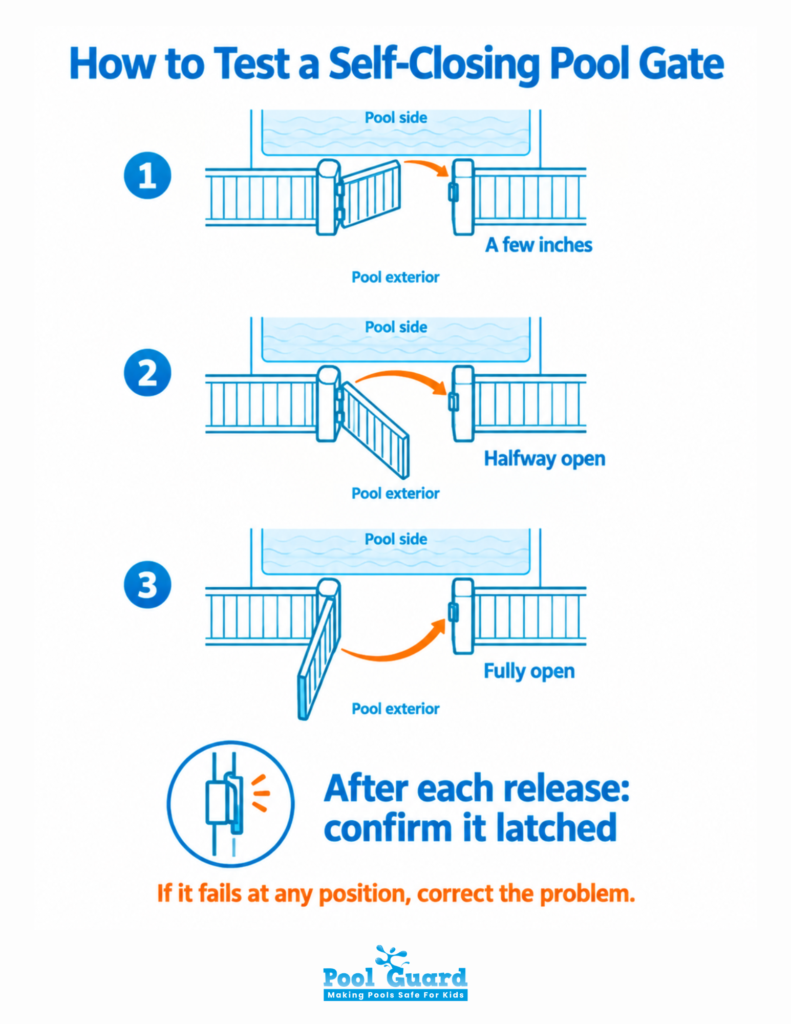
Once you’ve checked the hardware, perform a self-closing pool gate test from several starting positions.
Open the gate a few inches and release it, then repeat from halfway and fully open. After each attempt, gently pull the gate without operating the release to confirm that it latched securely.
The gate should close and latch on its own every time. If it fails at any position, correct the problem before relying on it as a pool safety barrier.
Follow this sequence before you drill:
Ask the building department which code edition and amendments it enforces, and whether a gate latch falls under a state statute (as in California) or only local adoption.
Decide whether it will be reachable from outside or only from the pool side. That choice sets which dimensions apply.
Record the ground-to-release height, and check the openings around the release zone.
Pick a latch that works with your gate frame, post type, and gate swing. Choose hardware compatible with the gate’s frame, swing, and closing mechanism. Follow the manufacturer’s installation and alignment requirements, regardless of latch type. Key-lockable models add security but must still latch on their own without the key.
Run the closure and latch tests from several positions, and re-measure the final release height before you call it done. These are also the kinds of details worth checking during routine pool safety inspections.
Getting pool gate latch height right involves more than meeting a minimum measurement. The release must be positioned according to the applicable local code, with its location and accessibility considered alongside the gate’s design. While 54 inches is a common reference, California requires 60 inches for qualifying pool enclosure gates.
Proper installation also means ensuring the gate closes and latches automatically from different positions. If you’re installing a new latch or adjusting an existing one, Pool Guard USA can help assess your gate, identify suitable hardware, and address potential safety concerns. These checks help maintain an effective pool barrier and reduce the risk of unsupervised access.

Please fill out the form below with your information. Your local dealer will be notified about your inquiry.
Please fill out the form below with your information. Your local dealer will be notified about your inquiry.